
DIY No Sew Curtains
I can’t be alone when I make this statement: window coverings are by far are my least favorite interior design activity. Finding just the right set is no easy feat: the color, the texture, the length, the curtain rod, the curtain hooks - just eww.
We are very fortunate enough to have a nature preserve just beyond our fence line. Finding the right window treatments had a long list of to-dos: 12’ in length, provide covering, but not so much that it obstructed our green space view. With a little bit of research, a quick trip to the hardware store, and a weekend full of washing and ironing - I was in business!
I hope you’re sitting down, because I proudly present to you, the easiest DIY project on earth: no sew drop cloth curtains!

safety first, obv.
Let me also preface by saying that all of the curtain rods throughout our house were custom made using, you guessed it, black iron pipe. We are nothing if but fully committed to this design aesthetic. However, here are a handful of similar styles that you can buy to recreate the look: Lowes | Wayfair | Overstock
Here’s what you’ll need:
Curtain rod
4’ x 12’ heavy duty canvas drop cloths
7 pc curtain hooks
Drop cloth tip: designer preference here, but I will say I much preferred the way the heavy duty drop cloths felt to the touch, and thought the heavier material laid better. Don’t be afraid to open the packaging and feel what you’re buying - especially to make sure there’s no plastic backing!
Don’t be alarmed, but there is a terrible smell associated with the drop cloths, and the stench seems to waft through the house before even opening the packaging. I’m not sure I can adequately explain what exactly it smells like, so I’ll leave that revelation to those who choose to accept this challenge. As soon as you open them, immediately put them in the washing machine - but do not wash in hot water or they’ll shrink! I’d be lying if I said I hadn’t been there, and done that. As soon as they come out of the dryer, start ironing to prevent as much wrinkling as you can, and lay flat until you’re ready to hang.
How you choose to let them hang is certainly up to you - if you look at other DIY tutorials, some people opted to fold over the extra material (if any) on the top to look like a valance. If you’re like me, and that’s not your thing, I opted to hang them straight, and trim any extra material from the bottom. If you have a lot to cut off, consider using iron on adhesive tape to make an extra crisp line.
Steam out any creases, spray with Fabreze for good measure, and viola! Doesn’t get any easier than that! I mean, the transformation speaks for itself!
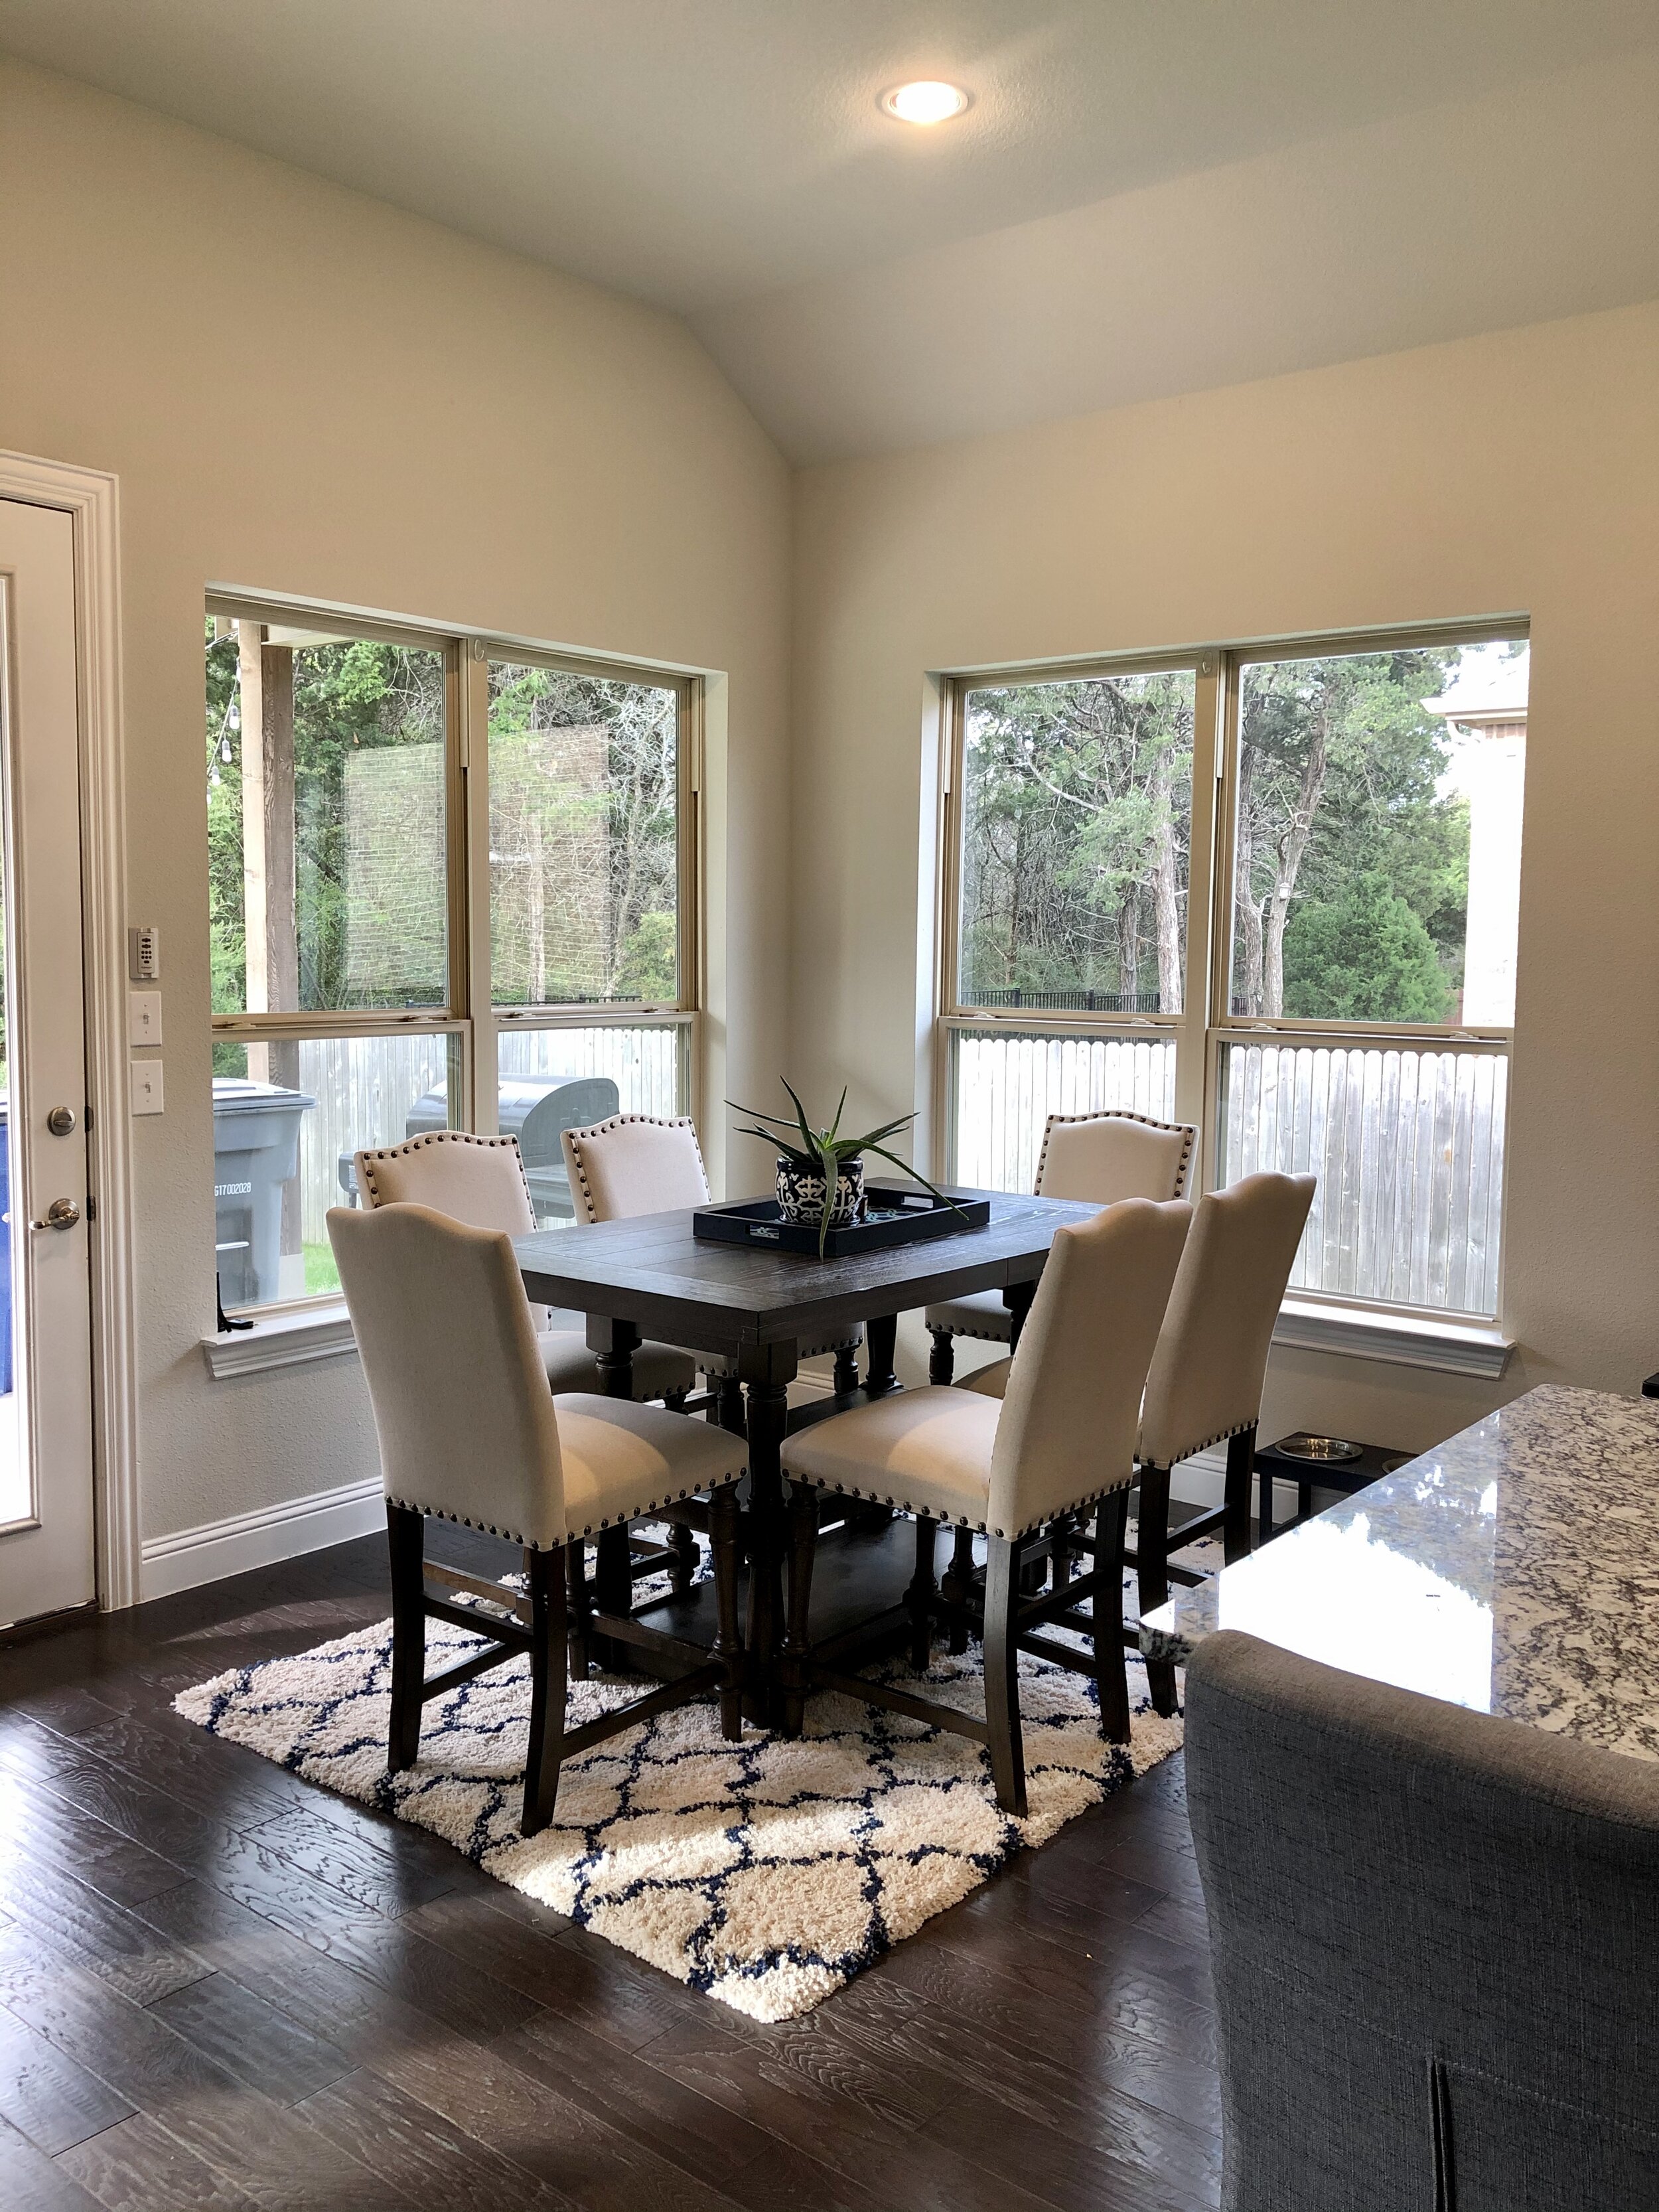
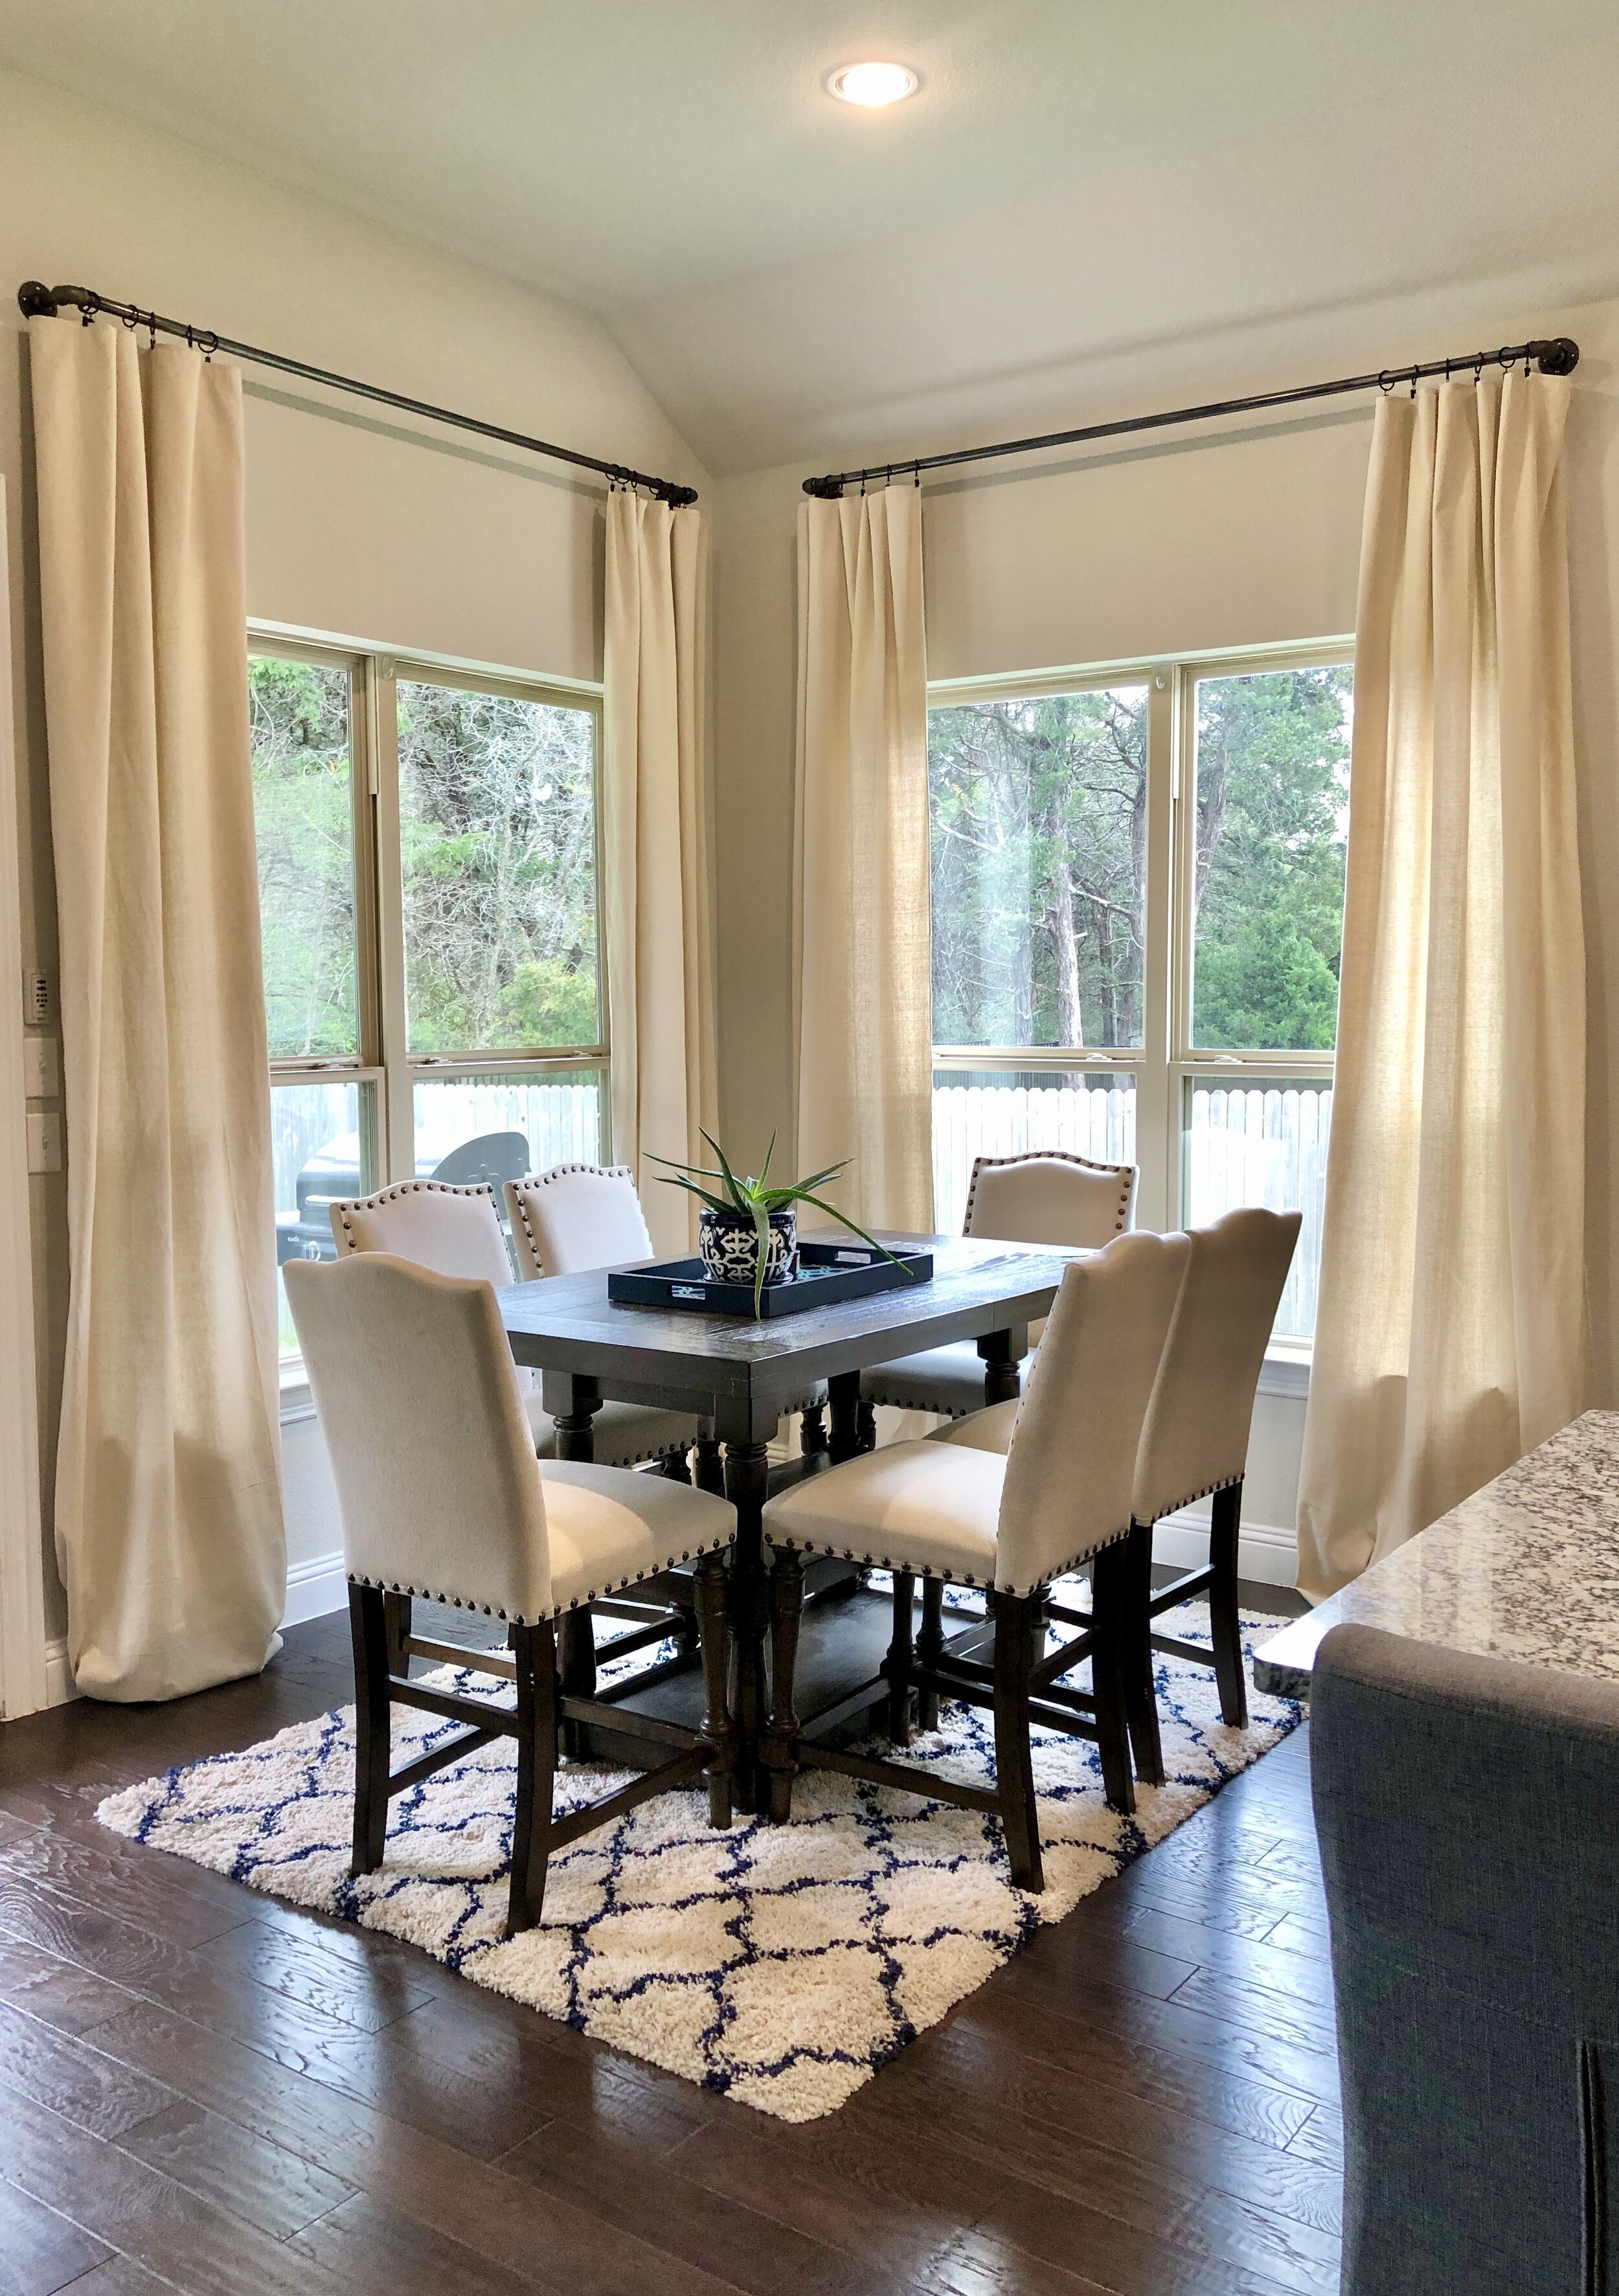
I have drop cloth curtains in all of our bedrooms, living room, kitchen and soon to be office. What can I say, we’re committed. But when you can make curtains for less than $20 per panel, why not go crazy!?
Happy curtain-ing!
Yours Truly,
Jordan